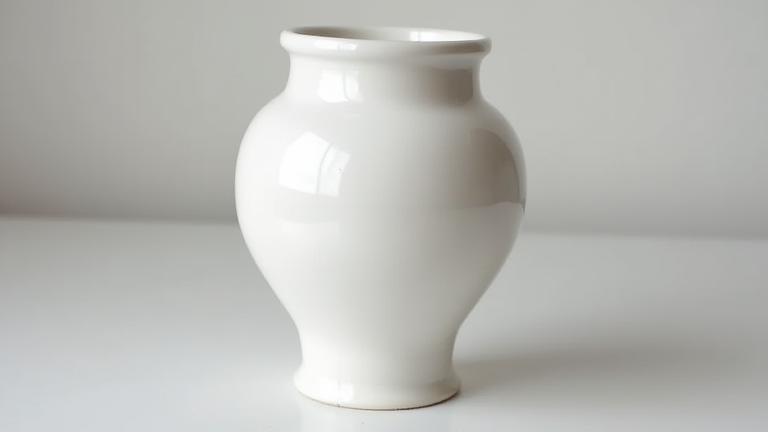
TL;DR: Create a stunning DIY porcelain vase by hand-building a cylinder from air-dry clay and applying a glossy white glaze to mimic authentic porcelain. This beginner-friendly method allows you to achieve a professional, minimalist aesthetic without needing a kiln or advanced pottery skills.
DIY Porcelain Vase Tutorial: 5 Easy Steps for Beginners
Creating a porcelain-style vase at home is a rewarding project that blends art and functionality. While true porcelain requires high-temperature firing, you can replicate its smooth, elegant look using air-dry clay and specialized sealants. This guide walks you through five simple steps to craft a beautiful, durable vessel for your home decor.
If you want to dig deeper, check out our guide on Elevate Your Home: Styling Tips for Porcelain Vases.
Step 1: Prepare Your Materials and Workspace
Begin by gathering high-quality air-dry clay in a white or off-white shade, a rolling pin, a smooth wooden board, and a sharp knife. Ensure your workspace is clean and covered with a drop cloth to prevent mess. White clay is essential for achieving that classic porcelain base color, so avoid using natural earth tones if you want a traditional look.
Step 2: Roll and Cut the Clay Cylinder
Roll out a slab of clay that is approximately 1/8 inch thick. Use a ruler or a curved template to cut a long rectangular strip. The width of this strip will determine the circumference of your vase, so measure carefully. Aim for a height of about 8 to 12 inches for a standard decorative vase. Keep the edges as straight as possible to ensure a clean final shape.
Step 3: Form and Seal the Vase Shape
Wet the edge of the clay strip slightly with water to act as an adhesive. Roll the strip into a cylinder, overlapping the edges slightly. Press the seam firmly to bond the two sides. To create a stable base, cut a circle from the remaining clay that matches the diameter of your cylinder and attach it to the bottom. Smooth any lumps or ridges with a damp sponge or modeling tool to achieve a seamless, porcelain-like surface.
Step 4: Apply the Finish
Once the clay is completely dry, which may take 24 to 48 hours, it is time to add the porcelain effect. Lightly sand the surface with fine-grit sandpaper to remove any texture. Apply a thin, even coat of white acrylic paint or a white primer to ensure uniformity. After it dries, apply a high-gloss varnish or polyurethane in multiple thin layers. This glossy finish is the key to mimicking the reflective quality of glazed porcelain.
Step 5: Decorate and Cure
Allow the final coat to cure fully for at least 24 hours. For added elegance, you can use metallic acrylic paints to add subtle gold or silver accents around the rim or base. Avoid placing water in the vase immediately; instead, let the sealant cure completely before using it for dried flowers or as a standalone decorative piece. This ensures the durability of your handmade porcelain-inspired vase.
FAQ
Q: Can I use this vase for fresh cut flowers?
A: No, because the sealant is not waterproof for prolonged liquid exposure, it is best used for dried flowers or as a decorative object only.
Q: How do I prevent cracks while the clay dries?
A: To prevent cracking, dry the vase slowly in a shaded area away from direct heat sources, and ensure the clay thickness is consistent throughout the piece.
Q: What if the glossy finish looks uneven?
A: If the finish is uneven, lightly sand the surface with very fine sandpaper and reapply a thin, even coat of varnish, ensuring you work in a dust-free environment.
Leave a Reply